One of our customer has offered a challenge. The mission was to succeed to connect a fully open-source home automation system: Home-Assistant with a fully closed and proprietary system. Goal was to get an intuitive system, easily customisable by customer, and way more evoluary without constraints, and without changing all hardware installed. At end of article, you’ll know how to interface easily with CANBus home-automation system installed by Spline / Innoxel using Home-Assistant to take control over whole system.
I’ll start to present existing and informations we could collect, then I’ll go into the practical steps to discover the protocol and be able to mimic it with Home-Assistant and final result.
Existing system, installed around 10 years ago, is quite cumbersome and also not really common in home-automation. It’s based on AMX platform with NI-2100 controller that controls a CAN gateway.
CAN is a fieldbus at slow speed on one or two wires, very much used in cars and in industrial applications, quite similar in concept with KNX. It has been developped by Bosch in the 80’s.

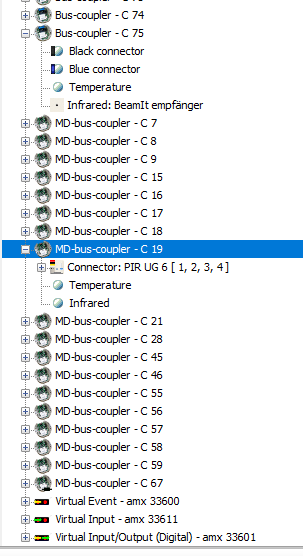
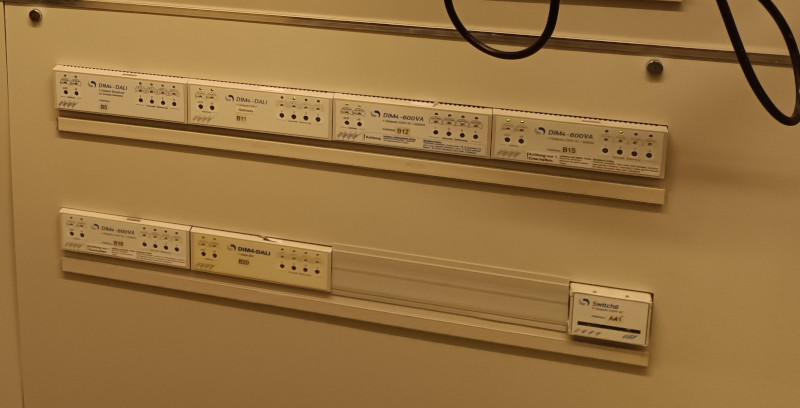
All inputs/outputs in the system are on the CANBus, which is very original for home-automation. According at our investigations, software part of the system is probably using a generic code loaded in the AMX controller, and a customised part done through a proprietary software (Smart-Control) from Spline company. Luckily, customer got copy of the programming software and project files. We have been able to discover that it works in a very similar way at KNX with a collection of inputs interfaces (dry contacts of wal buttons, radars, temperature sensors) and outputs (lights dimming, shades control, relays for heating system. Each module is physically numbered in electrical panel and also in program, so it should be easy to find connection between both.
After some investigations on Internet, we have found out that interfaces are manufactured by a swiss company Innoxel and use a non-documented protocol Noxnet. We’ll have to listen message on CANBus to try to decode it and understand the protocol.


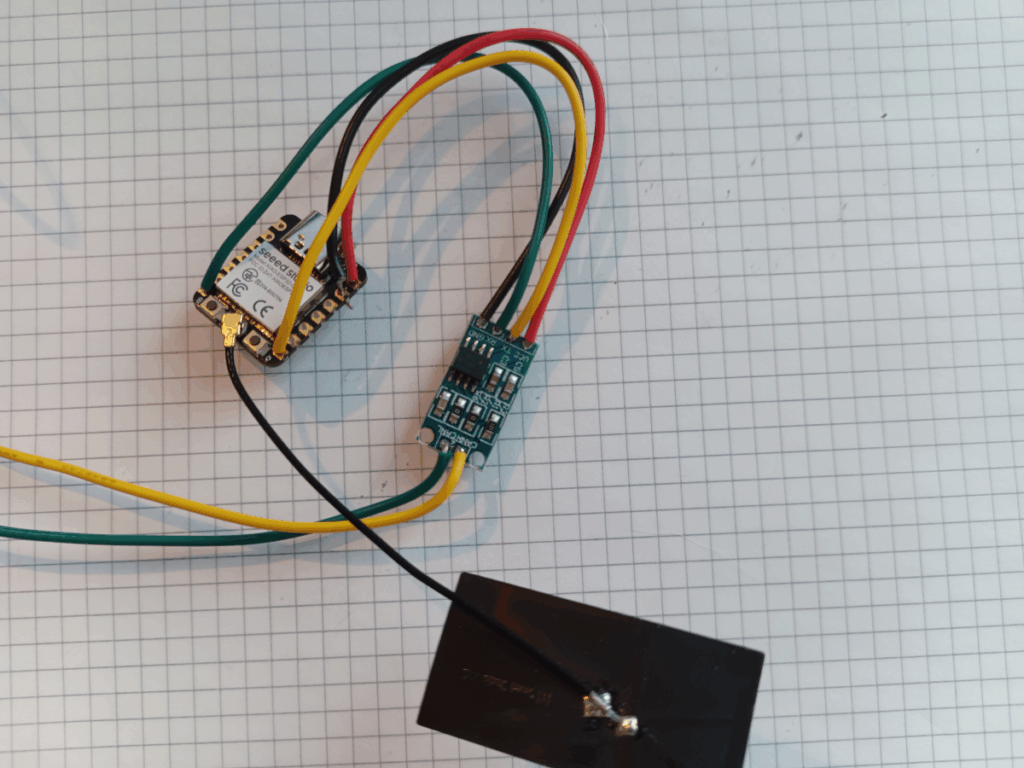
To do that, we are going to use ESPHome that supports CAN natively, using a standard CAN interface based on TJA1050, that is the most used chip for CAN interface. Simple assembly like on picture on left (ESP32-C3 de SeeedStudio and CAN interface) and little piece of ESPHome code should be all we need to listen what happens on the bus. Warning CAN is supported only on ESP32, not ESP8266 neither 8285.
canbus:
  - platform: esp32_can
    tx_pin: GPIO3
    rx_pin: GPIO33
    can_id: 4
    bit_rate: 100kbps
    use_extended_id: false
    on_frame:
    - can_id: 0x000
      can_id_mask: 0x000
      then:
      - lambda: |-
          std::string b(x.begin(), x.end());
          ESP_LOGD("can id 0x42B ", "%s", &b[0] );
4 keypoints regarding ESPHome sketch:
- can_id is address used by ESPHome for messages sent on CAN bus. For now, it doesn’t matter.
- bit_rate is bus speed, you need to be at correct speed to be able to communicate properly. Here we found the proper speed in Spline software.
- use_extended_id is sometimes used for large CAN systems. If you are in the wrong mode, ESPHome logs will tell you.
- we activate advanced debug options to get all details of CAN messages.
Once completed assembly of the ESP with CAN interface and flashed the ESP, we just need to connect the 2 CAN output wires on CAN bus of the installation (careful with polarity). We discover then there is a lot of traffic on the CAN bus. Even without any use of the system, a lot of CAN messages pass through (at such point, that ESPHome tells us some messages are lost/incomplete due to too much traffic).
First idea is to disconnect CAN gateway of the AMX controller but it doesn’t have really any effect, as it’s still as chatty than before. We think it might be the temperature sensor reporting all the time their status. We decide then, for start, to focus on a basic device like switches. We are going to monitor CAN traffic while we actuate a lot a switch during 30 seconds to find out messages for switch on and off.
[08:32:05][D][canbus:072]: received can message (#1) std can_id=0x41e size=2
[08:32:05][V][canbus:079]: can_message.data[0]=74
[08:32:06][V][canbus:079]: can_message.data[1]=33
[08:32:06][D][can id 41E:115]: t3
[08:32:08][D][canbus:072]: received can message (#1) std can_id=0x41e size=2
[08:32:08][V][canbus:079]: can_message.data[0]=54
[08:32:08][V][canbus:079]: can_message.data[1]=33
[08:32:08][D][can id 41E:115]: T3
[08:32:09][D][canbus:072]: received can message (#1) std can_id=0x223 size=2
[08:32:09][V][canbus:079]: can_message.data[0]=50
[08:32:09][V][canbus:079]: can_message.data[1]=46
[08:32:09][D][canbus:072]: received can message (#2) std can_id=0x42d size=2
[08:32:09][V][canbus:079]: can_message.data[0]=50
[08:32:09][V][canbus:079]: can_message.data[1]=46
[08:32:09][D][canbus:072]: received can message (#5) std can_id=0x41e size=2
[08:32:09][V][canbus:079]: can_message.data[0]=74
[08:32:09][V][canbus:079]: can_message.data[1]=33
[08:32:09][D][can id 41E:115]: t3
[08:32:09][D][canbus:072]: received can message (#6) std can_id=0x465 size=2
[08:32:09][V][canbus:079]: can_message.data[0]=6c
[08:32:09][V][canbus:079]: can_message.data[1]=3
What a surprise, we discover messages containing a T or t followed by a digit. Few additional pushes on different buttons confirm that they send a simple message: T for push and t for release followed by button number pushed (buttons are logically numbered in the opposite way of the physical position so button 8 on keypad shows up with number 0 in CAN). If we use ESPHome to send same message on bus using same address as one showing up in logs, Spline system reacts and trigger light commands for that button. So we are already able to get status of push buttons and also of radars as they work the same way.
We are also able now to find out the link between CAN addresses in Spline software and the ones used on the bus, by playing with few different keypads:
- A1 -> Ax for everything that is relay, power commands -> x203 for A1 and so on with one address not used in between each time (we’ll talk about it later). List of CAN addresses and Spline index.
- B1 -> Bx for all dimming (whatever dimming way: phase dimming, 0-10V, DALI) -> x60C for B1 and so on. List of CAN addresses and Spline index.
- C1 -> Cx for everything that is input (wall push-buttons, radars) -> x402 for C1 and so on. List of CAN addresses and Spline index.
Next step is to find out how lights and relays work. We are going to use the bargraphs avalaible on the touch panel of the system. This way, we’ll be able to get system to send lot of dimming commands and recognise them more easily..
[19:44:36][D][canbus:078]: received can message (#1) std can_id=0x614 size=8
[19:44:36][D][can id 0x42B :103]: W2000004
[19:44:36][D][canbus:078]: received can message (#2) std can_id=0x614 size=8
[19:44:36][D][can id 0x42B :103]: W3100004
[19:44:36][D][canbus:078]: received can message (#3) std can_id=0x610 size=6
[19:44:36][D][canbus:078]: received can message (#4) std can_id=0x614 size=8
[19:44:36][D][can id 0x42B :103]: W1000004
[19:44:36][D][canbus:078]: received can message (#5) std can_id=0x610 size=6
[19:44:36][D][canbus:078]: received can message (#6) std can_id=0x62c size=8
[19:44:36][D][can id 0x42B :103]: W1000004
This time, syntax is a little more complex but not much. We receive W to indicate dimming command, followed by a digit for the output number on CAN dimming module, then 3 digits for dimming value and again 3 digits for dimming time. For example,W2000004 is to dim circuit 6 (as for buttons outputs are numbered in reverse way), 000 to switch off the circuit and 004 for a dim curve in 4 seconds. Few tests have determined that the existing dimming, that is really not smooth, was due at bad quality of dimmers themselves. We’ll handle dimming ramp in Home-Assistant and not in the dimmer.
[19:44:02][D][canbus:078]: received can message (#1) std can_id=0x21b size=2
[19:44:02][D][can id 0x42B :103]: C0
[19:45:02][D][canbus:078]: received can message (#1) std can_id=0x21d size=2
[19:45:02][D][can id 0x42B :103]: C1
For on/off type of outputs such as relays, syntax is quite similar with binary inputs but this time it uses the letter C to indicate a relay with circuit number as previously. We’ll find same logic with shades using U for Up, D for Down and H for stop and circuit number. System is not able to handle intermediate position and once checked on touchpanel, system is only able to fully open/close shades without presets at specific positions !
We have now all we need to be able to control system from Home-Assistant easily using entities for each device/equipment controlled. It’ll give us native Home-Assistant controls for all Spline devices and then be able to remove the AMX controller and software that goes with it. We’ll have then a fully open home automation system, easy to customise according at customer wishes/requests, even possible by customer itself considering how easy HA is to use.
- Inputs of buttons and other dry contacts (Radar for example):
canbus:
  - platform: esp32_can
    tx_pin: GPIO3
    rx_pin: GPIO33
    can_id: 4
    bit_rate: 100kbps
    use_extended_id: false
    on_frame:
    - can_id: 0x450  # ID du device CAN à écouter
      then:
        - lambda: |-
            std::string message(x.begin(), x.end());
            if (message == "T3") {
              id(can_bus_button_state).publish_state(true);  // Bouton appuyé
            } else if (message == "t3") {
                id(can_bus_button_state).publish_state(false);  // Bouton relâché
            }

binary_sensor:
  - platform: template
    name: "bouton lumiere"
    id: can_bus_button_state
Here we manage pushbutton at CAN address 0x450 and wired on input 5 of CAN module. It’ll show up now straight in HA and so we’ll be able to trigger some automations or other depending of state of the button.
- Control of ON/OFF circuits (usually everything that is relay based):
switch:
  - platform: template
    name: "Pompe piscine"
    optimistic: True
    turn_on_action:
      - canbus.send:
          data: "S6"
          can_id: 0x21D
    turn_off_action:
      - canbus.send:
          data: "C6"
          can_id: 0x21D
Here we are going to control a pump through a relay that is the 3rd one on CAN interface at address 0x21D. It’ll show up as a binary contact in HA.
- Shades/Curtains control:
cover:
  - platform: time_based
    name: Canbus Test Cover
    id: TestCover
    device_class: shutter
    has_built_in_endstop: true
    open_action:
      - canbus.send:
          data: "U0"
          can_id: 0x211
    open_duration: 39s
    close_action:
      - canbus.send:
          data: "D0"
          can_id: 0x211
    close_duration: 36s
    stop_action:
      - canbus.send:
          data: "H0"
          can_id: 0x211
For curtains, we’ll have 3 commands instead of 2 with U for up, D for Down and H for stop. HA being able to manage shades with timer, we’ll be able now to do some specific settings like “open the shade at 50%).
- Lights dimming (lights with only ON/OFF are controlled like relays):
light:
  - platform: monochromatic
    name: "light1"
    id: light1
    output: output1
    default_transition_length: 3s

output:
  - platform: template
    id: output1
    type: float
    write_action:
      then:
        - if:
            condition:
              - light.is_off: light1
            then:
              - canbus.send:
                  can_id: 0x67C
                  data: "W2000000"
        - if:
            condition:
              - light.is_on: light1
            then:
              - canbus.send:
                  can_id: 0x67C
                  data: !lambda |
                    char buf[128];
                    int brightness = static_cast<int>(id(light1).current_values.get_brightness ()* 100);
                    brightness = (brightness > 100) ? 100 : brightness;
                    int transfer_time = 0; # temps de transfert du can
                    sprintf(buf, "W2%03d%03d", brightness, transfer_time);
                    std::string s = buf;
                    return std::vector<unsigned char>(s.begin(), s.end());
String to send being more complex here, we’ll need to use Lambda in ESPHome but it allows light circuits to show like a light entity in HA. As we have seen previously that dim ramp are poorly managed by dimmers, we’ll keep the time at 0 all the time and handle it only in HA (it’s not perfect but a lot better without changing dimmer hardware).
We now have all the tools to get the whole CAN system usable and controlable by Home-Assistant in an native way as all CAN interfaces will show up now as Home-Assistant entities.
It’ll grand also lot more scalabitily at system as we can now integrate also all devices supported by HA and in a lot easier way than the Spline system.
That investigation has been possible thanks at one of our customer that was ready to pay work on it without any warranty of a positive result. Thanks to him, other users of Spline system can now free their system and open it so it’s a lot more usable and scalable, and for a lot lower cost.
You are the owner of a Spline or Innoyel system and you want to enhance it for a more open and scalable system. Feel free to contact us.
Recent Comments